pocket sniper logo

AIMING METHODS

On this page we want to deal a little bit with AIMING. It is one of the most discussed topics in billiards and for sure some of the secrets of pool geometry. Every pool player is struggling with it. There are so many systems, so many opinions, so many problems with aiming. We will cover two main Aiming Methods which you can learn and use by practicing with POCKET-SNIPER. They will help you to see the correct Aiming Point – that is the point at which you aim the center of the Cue Ball.

If you are able to deliver the Cue Ball so that it rolls over the Aiming Point of the POCKET-SNIPER, the cue ball must contact the Object Ball at the proper contact point, and the Object Ball must go in. This is always true, no matter where the Cue Ball is located at the beginning of the shot! These are great news, right?! So, let’s get started!

When you start aiming and practicing with POCKET-SNIPER, you will start to visualize the shots more easily and after some time you will recognize the correct Aiming Point even if POCKET-SNIPER is not on the table any more. This is because our brain is working with pictures. Positive pictures of potting Object Balls will be burned into your brain memory and you will automatically know where to aim if you see a similar situation in a game of pool. Even if it is different, maybe a little bit thinner, you will steer and control it subconsciously.

GHOST BALL METHOD

The GHOST BALL METHOD (GBM) is most commonly used when explaining to beginners how to aim properly. This method is indeed mostly targeting the beginner and intermediate levels of players. Advanced and Pro-Players will use the GBM especially on Carom Shots, because if you rely on feel, you will almost always hit carom shots too thick. Nevertheless, the GBM is one of the most important aiming methods.

The GBM requires that the player imagines the Cue Ball position at the point of impact, when the Cue Ball is frozen on the Object Ball, touching it at the point of contact, and than to aim at the center of this imaginary Ghost Ball. Sounds quite simple, but for most players it is very difficult to imagine this Ghost Ball and to see the Aiming Point. And that is exactly where POCKET-SNIPER comes into the game!

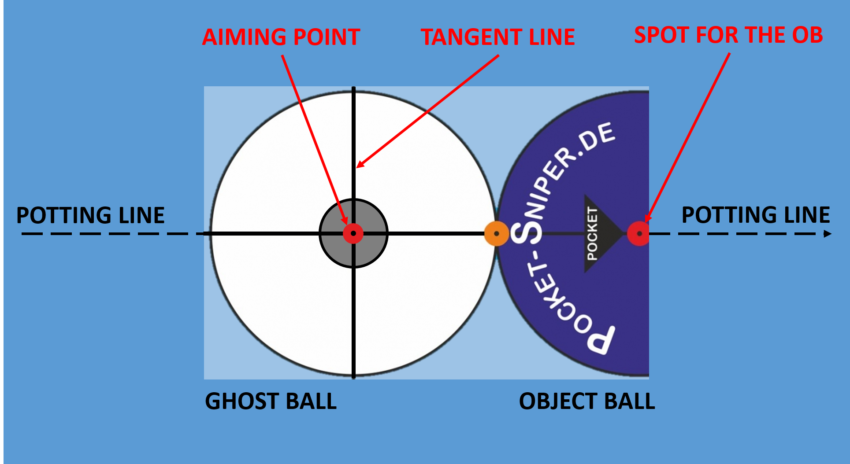
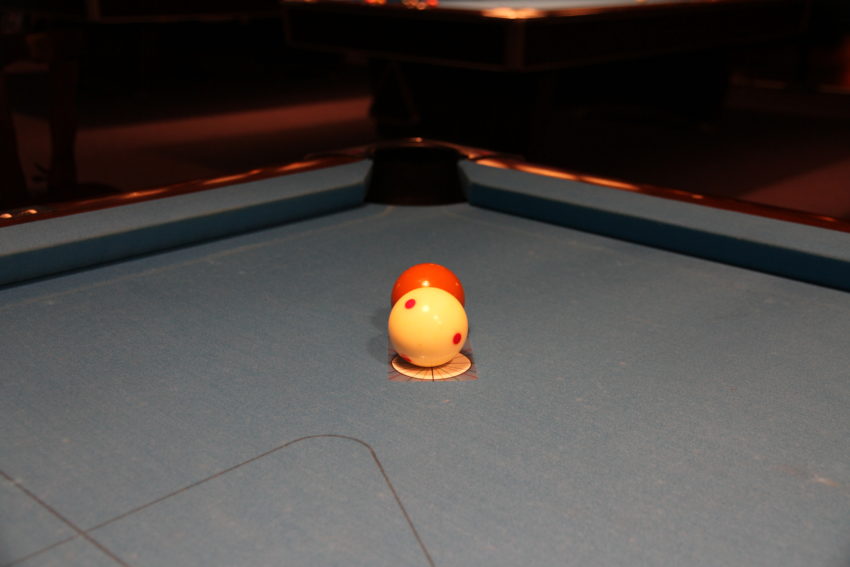
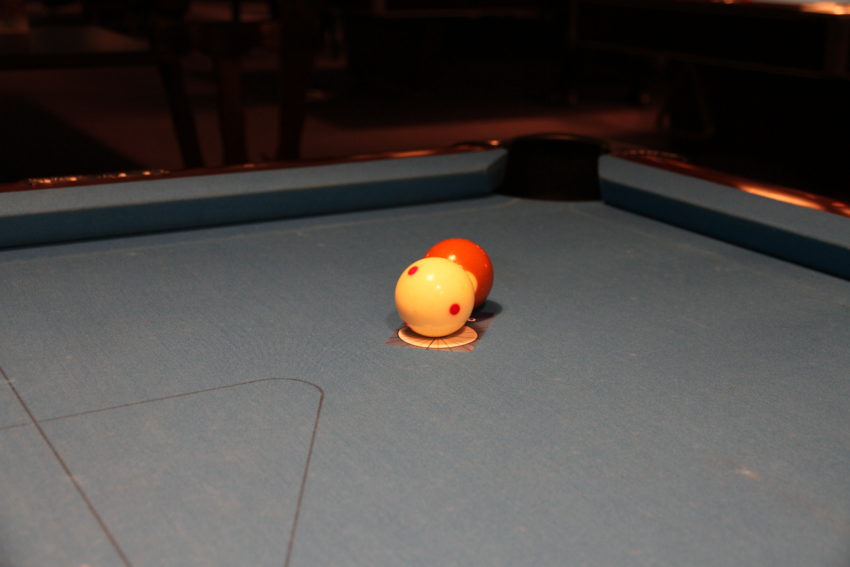
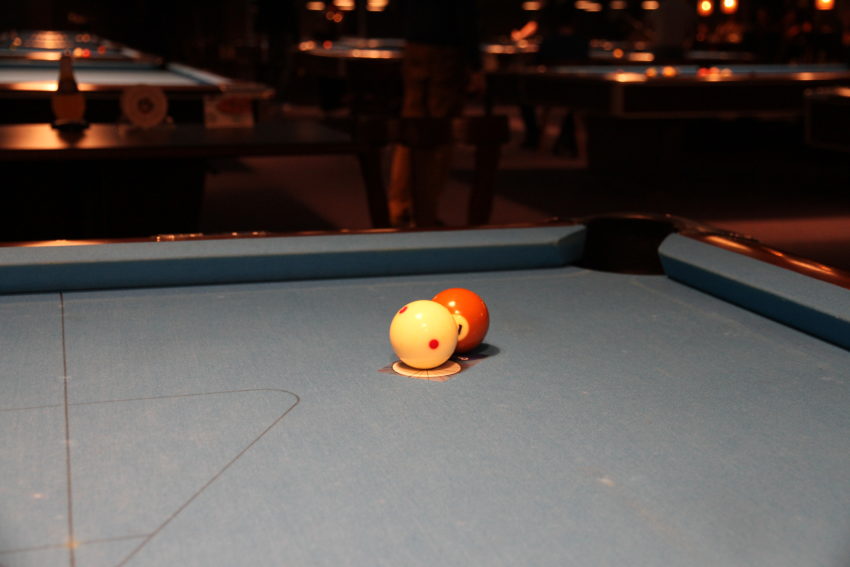
POCKET-SNIPER visualizes the Ghost Ball and the Aiming Point for the player, so the player can properly aim at the correct spot without having the fear to be misaligned. It also shows you the Tangent Line which is very helpful as you will learn in the DRILL SECTIONPOCKET-SNIPER has to be aligned in the direction of the pocket (Potting Line) using the black center line and the black arrow. The white circle represents the Ghost Ball and the blue semicircle represents the Object Ball. The red dot in the middle of the Ghost Ball represents the Aiming Point.

Place the Object Ball at the intended spot and you are basically ready to fire away! It is necessary to shoot the Cue Ball directly through the center (Aiming Point) of the white circle (Ghost Ball) to succeed. The other black line, at a 90° angle with the center line, represents the Tangent Line and the path the Cue Ball will take when a cut shot is played as a stun-shot (no forward or rearward rotation of the Cue Ball at the time of contact with the Object Ball). Now deliver the Cue Ball with a straight stroke to the Aiming Point and you will make the Object Ball into the pocket.

Now if you come behind the Cue Ball, align yourself to the Aiming Point. This imaginary line from the Cue Ball to the Aiming Point is your Stroke Line. Get down into your stance, swing your cue a few times to make sure you are perfectly aligned to the Aiming Point. When you are ready, stop with the swing of your cue and focus. This is your point of no return. You are confident, there are no doubts any more. Swing slowly back with your cue and deliver the stroke towards the Aiming Point through the Cue Ball and stay down. Watch the Object Ball fall into the pocket. Now stand up and continue your drill.

3-CUT-AIMING METHOD

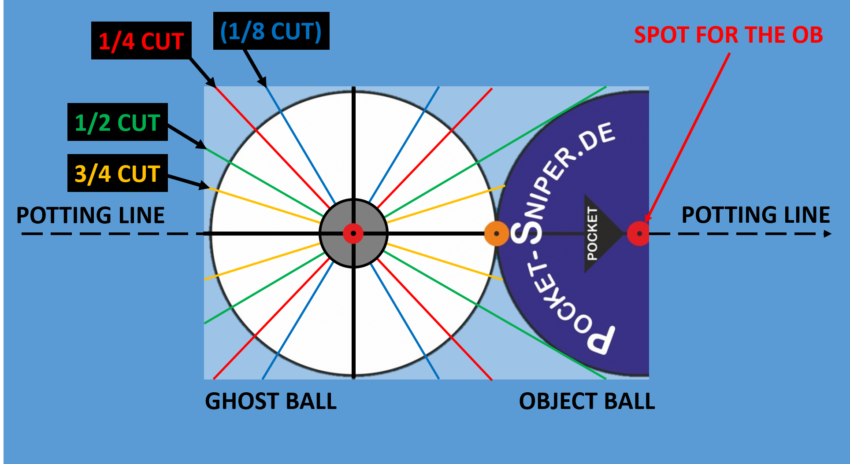
The theoretically infinite number of angles for cut shots in the range of 0-90 degrees is reduced to 3 standard angles – 3 cut angles. Statistics show that these standard angles you will find on more than 75% of all possible shots. Remember that also the pockets are much wider than the Object Balls, this give you an additional tolerance of about 2° for the cut angles. You can play position to be in the range of these three standard angles (approx. 15°, 30° and 45°) which represents the 3/4 Hit, 1/2 Ball Hit and a 1/4 Hit. POCKET-SNIPER shows you on which cutting line you are:

Throughout intense training of these situations you will be able handle them very good in a short period of time. If you are faced with a similar shot you will be able to recognize it, if it’s one of these standard cut shots or you have to aim a little fuller or thinner on the Object Ball. The blue line (representing the 1/8-Ball-Hit) is to practice very thin cut shots. If the Cue Ball lies in the extension of a colored line, you are faced with one of the following standard shots:

BLACK LINE // FULL HIT - STRAIGHT SHOT

ORANGE LINE // 3/4 HIT

GREEN LINE // HALF BALL HIT

RED LINE // 1/4 HIT

DID YOU KNOW?

There is much more about potting Object Balls than to just know where to aim. First of all you need to know if your perspective is correct: are you aiming with the correct eye? Is your stroke straight? Are you able to hit the Cue Ball at the right point and can you deliver it to the Aiming Point? If you aim with side spin, your Cue Ball will deflect in the opposite direction! You need to adjust for that. Read carefully the following information, they will help you to get a better understanding of how it works!

DOMINANT EYE

Have you ever considered which eye you aim with? It may be your left, your right, or maybe both. This is critical to aiming! You need to know your dominant eye! Are you left or right handed compared to your dominant eye? For example, if your right eye is dominant and you are right handed, then that’s the most proper and pure way to aim, with the dominant eye directly over the cue. If you don’t believe this, try playing with your opposite hand for 2-3 hours and then switch to your dominant hand and you will most likely find yourself missing a lot of shots, at least until your mind switches back, along with your dominant eye.

STRAIGHT STROKE

The stroke, building your muscle memory on mastering tip position is equal to how good you aim! If your stroke or tip position isn’t there, how can you aim properly to even pocket an Object Ball? The answer is: You can’t! Try this simple drill to find out how straight your stroke is. Set the Cue Ball on the head spot and try to hit a simple center ball hit straight down to the middle diamond on the foot rail to deliver the Cue Ball back again to the starting spot. If you executed this accordingly it should roll back to the spot and hit the tip of your cue. Try and perform this shot 10 times in a row. If you think you are hitting the Cue Ball where you think you are this should be no problem for you. But any little bit of side spin applied to the Cue Ball will not work with this shot. The center ball hit is the hardest to hit. Master tip position and stroke, and your aim will be equally as deadly.

If your stroke is bad then your tip position is off, meaning you aren’t hitting the Cue Ball or spin that you want for that shot. For example, you could hit straight Right Hand English, thinking that you hit center ball instead, and deflection from the spin departs off your line of aim causing the Cue Ball to overcut or undercut the Object Ball which causes “throw” to the Object Ball as well. If that’s off, then your line of aim will be off, causing failure to hit the Contact Point, thus pocketing the Object Ball.

CUE BALL DEFLECTION

If you play the Cue Ball with some side spin (English) your Cue Ball will deflect or squirt. What does this mean? Basically, the Cue ball does not travel the same path that your cue stick is aiming when English is applied to it. Because of the side spin, the Cue Ball will tend to slightly travel in the opposite direction of your English. In other words, if you put a left English or left side spin on the Cue Ball, the Cue Ball will travel slightly to the right and vice-versa. You can read more about that in our BLOG soon.

ALL COPYRIGHTS RESERVED.

IMPRINT   I   LEGAL    I   TERMS

Menu